
Key Takeaways
Good Renault driveability problems troubleshooting starts with describing exactly when the fault occurs, then confirming it with codes, live data, and targeted tests.
- Record whether the symptom appears cold, warm, at idle, or under load.
- Check warning messages and diagnostic trouble codes before replacing parts.
- Test air, fuel, ignition, sensors, wiring, and grounds systematically.
- Separate engine misfires from clutch, transmission, mount, and suspension faults.
- Clear confirmed faults, complete a road test, and verify the repair.
Identify the driveability symptom before testing
A vehicle that feels “rough” can have several different causes, so the first useful diagnostic tool is a precise description. Note the engine temperature, road speed, throttle position, gear, weather, and whether the symptom is constant or intermittent. This information prevents a technician from testing unrelated systems. It also makes Renault driveability problems troubleshooting much more efficient.
Rough idle, misfires, and engine vibration
At idle, an engine misfire may feel like a repeated shake, an uneven exhaust note, or a vibration through the seat and steering wheel. A fault that becomes less noticeable as engine speed rises may point toward ignition, air leakage, or fuel mixture problems, although mechanical timing and compression still need consideration. Do not assume that every vibration is an engine fault; a damaged mount can transmit normal combustion pulses more strongly.
Record whether the tachometer moves, whether the exhaust smells unusually rich, and whether the check-engine light flashes. A flashing warning light generally deserves prompt attention because continued driving during an active misfire can damage the emissions system.
Hesitation during acceleration or under load
Hesitation usually appears when the engine must respond quickly to a changing air and fuel demand. It may feel like a pause, stumble, or brief loss of throttle response when pulling away, climbing a hill, or overtaking. Compare light-throttle acceleration with a heavier load, and note whether the problem occurs in one gear or across several gears.
A clean restart does not prove that the fault has disappeared. Intermittent sensor readings, weak ignition components, fuel-delivery limitations, and throttle-control faults can all behave differently at different temperatures and engine loads.
Stalling, hard starting, and intermittent cutouts
A stall immediately after starting is different from a stall when braking, turning, or coasting to a stop. Hard starting can involve fuel pressure, ignition, crankshaft position feedback, or excessive air entering the intake. If the engine cuts out abruptly as though the key were switched off, electrical supply and position-sensor signals deserve particular attention.
Write down whether the starter motor turns normally and whether the engine restarts immediately. A fault that vanishes after several minutes may be heat-related, while one that appears after rain or washing may involve moisture in a connector or wiring harness.
Poor fuel economy, reduced power, and limp mode
Fuel economy should be judged over comparable journeys rather than from a single trip-computer reading. Reduced power can result from a restricted intake or exhaust, incorrect mixture control, ignition faults, or a protective operating strategy. Limp mode is a symptom and a control response, not a diagnosis by itself.
Ask whether the reduced power arrived with a warning message, a new noise, smoke, or a change in shifting behavior. A careful symptom timeline is often more valuable than a long list of parts that have already been changed.
Start with basic checks and fault-code data
Begin with observations that require little disassembly. Check the dashboard, battery condition, fluid levels, visible hoses, and recent repair work before reaching for expensive components. A dashboard warning light guide can help organize the meaning of common warnings, but the vehicle’s own manual and the measured fault remain the final reference. The aim is to establish evidence before testing.
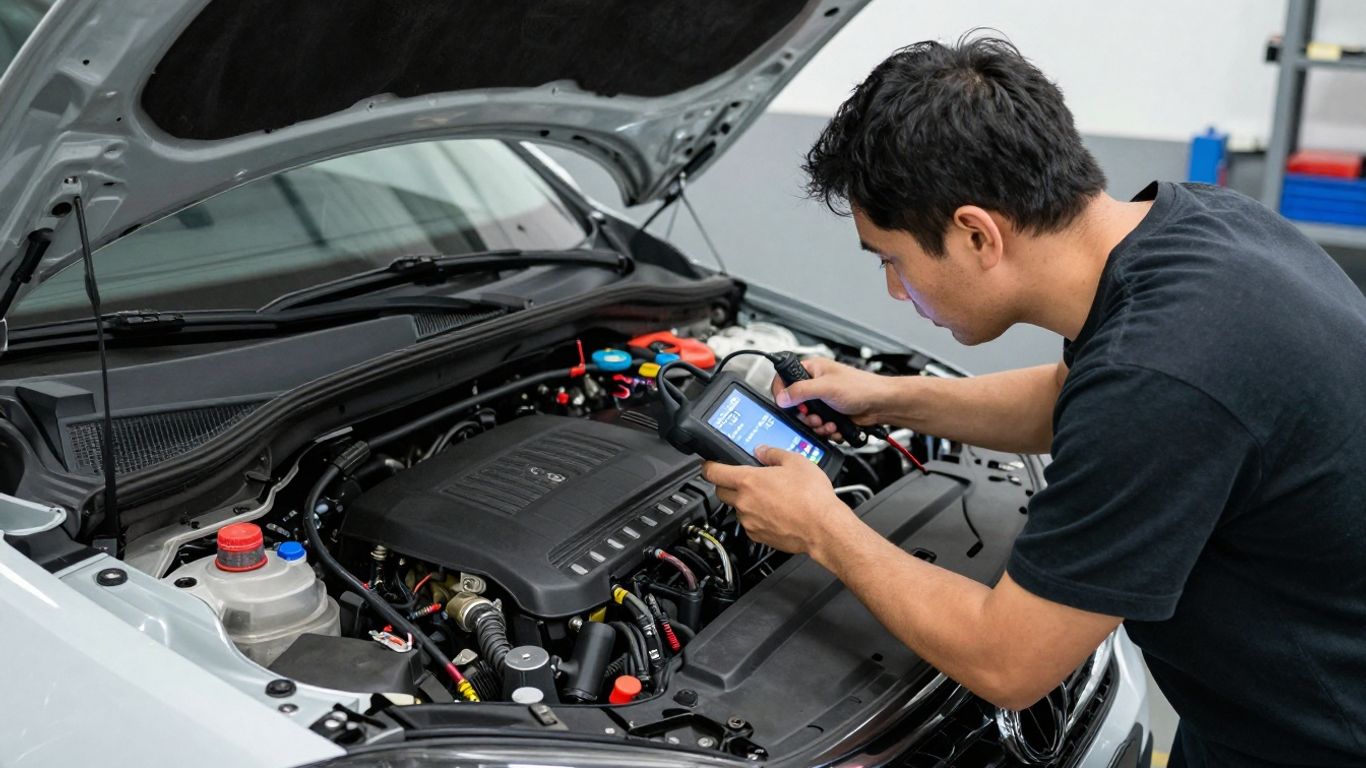
The image belongs at this stage because a scan result is most useful when paired with what the driver actually experienced. Codes narrow the search, while inspection and measurement decide which component is at fault.
Inspect warning lights and dashboard messages
Record every warning light and message, including those that disappear after a restart. Note whether a stop message, engine warning, battery symbol, or transmission warning appeared before the driveability problem. The sequence matters because a low-voltage event can create several secondary messages at once.
Do not continue driving when the vehicle warns of an unsafe condition, loses oil pressure, overheats, or develops severe misfire symptoms. If the message permits cautious travel, avoid high load and arrange diagnosis promptly rather than treating the warning as a service reminder.
Read diagnostic trouble codes with an OBD scanner
Connect a suitable OBD scanner and save stored, pending, and historical codes before clearing anything. A cylinder-specific misfire code, mixture code, sensor code, or communication code each suggests a different testing path, but none automatically identifies the failed part. Some faults are also recorded only after particular operating conditions have been met.
Use the code definition as a starting point, then inspect the circuit and related systems. For example, an oxygen-sensor code may be caused by an exhaust leak, wiring problem, or mixture fault upstream of the sensor rather than by the sensor itself.
Review live data and freeze-frame information
Freeze-frame data can show engine speed, coolant temperature, load, and other conditions present when a fault was recorded. Live data then allows those readings to be compared during idle, acceleration, and steady cruising. Look for values that disagree with the physical conditions, change erratically, or remain fixed when they should respond.
A single number outside a generic internet range is not enough to condemn a component. Vehicle specifications, engine version, sensor type, and test conditions all affect interpretation. Compare related readings and test the circuit when the data points to a specific system.
Check service history, fuel quality, and recent repairs
Recent work is a valuable diagnostic clue, not proof of technician error. Check whether plugs, belts, intake parts, battery cables, or software were recently disturbed. Confirm that connectors are fully seated and that hoses, grounds, and covers were returned to their correct positions.
Fuel contamination should also remain on the list after refueling or prolonged storage. A practical history should include the date of the first symptom, the last fill-up, maintenance performed, weather conditions, and whether the problem changed after a restart.
Check the engine air, fuel, and ignition systems
Once the basic data is recorded, test the systems that directly control combustion. Air entering without being measured, inadequate fuel pressure, and weak spark can create very similar sensations. Test the basics first because a simple leak or poor connection can imitate an electronic failure. Work from the intake toward combustion and then confirm the result under the conditions that caused the complaint.
Test for vacuum leaks and intake restrictions
Inspect intake boots, vacuum hoses, gaskets, and breather connections for splits, loose clamps, or collapsed sections. A smoke test can reveal small leaks that are difficult to see, while a restriction check can identify a blocked filter or damaged duct. Do not spray flammable substances around a hot engine as an informal leak test.
A vacuum leak often affects idle more strongly than higher engine speeds, but that pattern is not universal. Compare fuel trims and engine response before and after a confirmed repair, and make sure the replacement hose or seal is appropriate for heat and oil exposure.
Inspect the throttle body and electronic throttle control
Carbon deposits, a sticking plate, wiring faults, or an incorrect throttle-position signal can affect starting and acceleration. Inspect the connector and harness first, then follow the manufacturer’s cleaning and adaptation procedure. Electronic throttle bodies should not be forced by hand unless the service instructions specifically allow it.
If throttle response is limited, determine whether the control unit has entered a protective mode. A throttle code can reflect a sensor disagreement, power-supply problem, or communication issue rather than a dirty housing alone.
Evaluate spark plugs, ignition coils, and misfire patterns
Remove and compare the spark plugs rather than inspecting only the one nearest a stored code. Look for worn electrodes, cracking, oil contamination, or signs of an excessively rich or lean mixture. Swap-test coils only when the procedure is safe and the results can be monitored with misfire data.
A misfire that follows the coil points toward that coil, while one that stays on the same cylinder requires broader checks. Compression, injector operation, wiring, and valve timing may all be relevant if ignition parts test normally.
Check fuel pressure, injectors, and fuel delivery
Measure fuel pressure under the conditions that produce the fault, including starting, idle, and load if the equipment permits. A pressure that drops during acceleration can indicate a supply restriction, weak pump, blocked filter, regulator problem, or electrical feed issue. Compare the result with the correct specification for the particular engine.
Injector balance and electrical pulse tests can help distinguish delivery problems from ignition faults. Avoid condemning injectors solely because a mixture code is present; air leaks and sensor errors can produce the same code.
Diagnose sensor and emissions-related faults
Sensors should be tested as part of a system, not replaced because a scan tool displays a related code. Check the reference voltage, ground, signal, wiring integrity, and plausibility against other readings. Emissions components can influence driveability, but their symptoms may overlap with ordinary intake, fuel, and ignition faults.
Test the mass airflow and manifold pressure sensors
A mass airflow sensor should respond smoothly as airflow changes, while a manifold pressure sensor should produce readings that make sense for engine speed, throttle opening, and load. Inspect for contamination, unmetered air, blocked passages, and damaged wiring before cleaning or replacement. Use the correct sensor-cleaning method if cleaning is permitted.
Compare the sensor reading with an independent measurement or a known operating condition. A plausible value at idle can still become inaccurate under load, so a road-test recording may be necessary.
Check oxygen sensors and fuel-trim readings
Short-term and long-term fuel trims show how much correction the control system is applying to maintain the commanded mixture. Large positive corrections can fit an air leak or low fuel supply, while large negative corrections can fit excess fuel or an inaccurate airflow signal. These are clues rather than verdicts.
Check for exhaust leaks before the oxygen sensor and inspect its heater circuit. A leak can draw outside air into the exhaust and distort the reading, leading to unnecessary parts replacement. When comparing readings, allow the engine to reach normal operating temperature.
Inspect the crankshaft and camshaft position sensors
The crankshaft and camshaft signals establish engine position and timing for fuel and ignition control. An intermittent signal can cause stalling, difficult starting, misfires, or a no-start condition, especially when a sensor becomes hot. Look for damaged wiring, oil contamination, loose mounting, and poor connector contact.
Use a scope or suitable scan data when a simple resistance test is inconclusive. A sensor may show an acceptable resistance value while its signal drops out during cranking or vibration.
Assess the exhaust gas recirculation system and catalytic converter
An exhaust gas recirculation valve that remains open at the wrong time can cause rough idle or hesitation. Carbon buildup, a failed actuator, blocked passages, or control faults should be considered. Testing must follow the engine-specific procedure because EGR systems differ considerably.
A restricted catalytic converter can cause loss of power that worsens under load. Back-pressure or vacuum testing is more useful than judging the converter by appearance alone. If a converter has failed, find the original cause—often a persistent misfire or mixture fault—before fitting another one.

The inspection is most effective when sensor readings, exhaust behavior, and the driver’s symptom are considered together. A timing-related driveability case illustrates why work performed around belts, throttle components, or engine timing should be included in the diagnostic history, without treating one anecdote as a universal explanation.
Investigate Renault-specific electrical and control issues
Electrical faults can look mechanical when voltage or communication becomes unstable. Start with basic electrical measurements, then inspect the physical network before suspecting a control module. Keep the diagnosis vehicle-specific: connector locations, module behavior, and software procedures vary by model and engine.
Check battery voltage, charging performance, and ground connections
Measure battery voltage at rest and during cranking, then check charging voltage with the engine running and electrical loads switched on. A weak battery or poor ground can produce slow cranking, erratic sensor signals, warning lights, and communication faults. Voltage-drop testing under load is more informative than visual inspection alone.
Clean, tight terminals are necessary, but do not remove cables casually on vehicles that may require electronic settings or relearn procedures afterward. Record the initial readings so the repair can be verified rather than assumed.
Inspect wiring, connectors, and moisture damage
Follow the harness from the affected sensor or actuator to its control module. Look for chafing, stretched wires, corrosion, pushed-back terminals, loose locking tabs, and water tracks. Movement tests can reveal an intermittent open circuit, but they should be performed carefully with the engine secure and rotating parts clear.
Moisture damage may be hidden beneath insulation or inside a connector. Repair the underlying sealing or routing problem as well as the damaged wire, otherwise the same fault may return after the next wet drive.
Evaluate the engine control module and software updates
Control-module diagnosis should follow confirmed power, ground, wiring, and sensor tests. Check whether an applicable software update or service procedure exists for the exact vehicle, but do not treat an update as a substitute for finding a damaged circuit or failed mechanical component. Save relevant codes and adaptations before programming work.
A module should be replaced only after its inputs, outputs, supply, grounds, and communication lines have been tested. This order protects against expensive parts-swapping and preserves useful evidence.
Understand warning lights, limp mode, and communication faults
Limp mode limits performance to protect the vehicle or allow cautious movement after a fault is detected. It can be triggered by throttle, boost, sensor, transmission, or communication problems. Scan all relevant modules rather than reading engine codes alone when several systems report faults.
A warning that disappears after cycling the ignition still belongs in the record. If the vehicle loses power in traffic, stalls repeatedly, or displays a stop-level warning, arrange recovery instead of attempting a long drive.
Separate engine problems from transmission and chassis symptoms
Not every shudder or loss of acceleration begins in the engine. The clutch, transmission, mounts, suspension, tires, and wheel-speed inputs can change how a normal engine feels from the driver’s seat. Diagnose the moment of the symptom: during combustion, gear engagement, clutch take-up, braking, cornering, or road-speed changes.
Recognize clutch slip and manual transmission issues
Clutch slip usually appears as engine speed rising faster than road speed during acceleration, especially in a higher gear or uphill. A burning smell, difficult engagement, or a clutch pedal that feels different adds useful context. Engine misfire, by contrast, tends to produce an uneven running sensation and may set misfire codes.
A road test should be brief and controlled. Repeatedly provoking slip can add heat and damage to an already worn clutch, so confirm the symptom with measured engine and vehicle-speed behavior when possible.
Check automatic and dual-clutch transmission behavior
Transmission faults may feel like hesitation when the actual issue is delayed engagement, harsh shifting, clutch control, or an incorrect gear choice. Note whether the problem occurs during an upshift, downshift, takeoff, or steady cruising. Check transmission fluid condition and stored transmission codes according to the applicable service procedure.
Do not interpret every low-speed judder as an engine misfire. Comparing the symptom in neutral, park, or manual-select modes—where safe—can help separate drivetrain behavior from combustion irregularity.
Distinguish drivetrain vibration from an engine misfire
A vibration tied to engine speed can point toward combustion, rotating components, or mounts. A vibration tied to road speed is more suggestive of wheels, tires, driveshafts, or other chassis components. If it changes when the accelerator is released but the vehicle continues at the same speed, that distinction becomes especially useful.
Use scan data during the vibration and inspect for uneven tire wear, bent wheels, or damaged driveshaft joints. Avoid assuming that a stored misfire code explains every vibration the driver feels.
Inspect engine mounts, suspension, and wheel-speed inputs
Worn mounts can exaggerate normal engine movement during starting, shifting, or acceleration. Suspension and tire faults can create shaking over particular speeds or surfaces, while wheel-speed sensor problems may affect traction control and transmission operation. Check for leaks, torn rubber, looseness, and uneven wear.
A stable engine at idle with vibration that follows vehicle speed deserves chassis inspection first. This separation keeps the repair focused and prevents unnecessary work on the fuel or ignition system.
Confirm the repair and prevent repeat problems
A repair is not confirmed simply because the warning light is off or the engine feels better in the driveway. Recheck the original symptom under safe, repeatable conditions and compare the new data with the initial record. The final stage of Renault driveability problems troubleshooting is proving that the root cause was corrected.
Use targeted tests instead of replacing parts by guesswork
Choose the next test based on the evidence already collected. For example, a cylinder-specific misfire may call for coil and compression checks, while a low-voltage communication fault calls for voltage-drop and ground testing. The most efficient workflow is usually narrower than replacing several plausible components.
A useful repair order is:
- Confirm the symptom and preserve the original codes.
- Test the suspected circuit or mechanical system.
- Repair the verified cause and inspect related damage.
- Recheck codes, live data, and the original symptom.
This sequence leaves a clear trail from complaint to conclusion. It also makes a later intermittent fault easier to investigate.
Clear codes and complete a controlled road test
Clear codes only after recording them and completing the repair. Follow the drive cycle needed for the relevant monitors, then reproduce cold starts, idle, acceleration, and load conditions as safely as possible. Watch for returning codes and changes in fuel trims, misfire counts, throttle response, and transmission behavior.
The road test should include a plan rather than random driving. If the fault returns, note exactly when it did and stop before a severe warning, overheating, or dangerous loss of power develops.
Verify adaptations, throttle learning, and relearn procedures
Some vehicles require throttle, idle, steering, transmission, or other adaptations to be relearned after a battery disconnect or component replacement. Use the correct service information and scan-tool procedure for the vehicle. Do not rely on a generic sequence copied from another engine or model year.
After the relearn, allow the system to stabilize and confirm that the idle, response, and stored values are appropriate. If a learning procedure fails, investigate voltage, wiring, mechanical alignment, and sensor plausibility instead of repeating it endlessly.
Set a maintenance plan based on the root cause
Prevention should follow the failure mechanism. A repaired intake leak may call for renewed hose inspections, while a misfire caused by neglected plugs may require a clearer replacement interval. Battery and ground checks are sensible after low-voltage faults, and fluid or filter service should follow the vehicle’s specifications.
Keep the diagnostic report, parts used, measurements, and road-test result with the service history. That record is more useful than a vague note saying “fault fixed,” especially when an intermittent problem returns months later.
A final video review can be useful for visual orientation, but it should supplement—not replace—the correct service information and measured tests. The same careful habit applies to unrelated automotive reading, including car comfort considerations, which may matter to passengers but do not diagnose an engine fault.
Conclusion
Driveability faults become less mysterious when the symptom is recorded precisely and each test answers a specific question. Begin with warnings and codes, move through air, fuel, ignition, sensors, wiring, and mechanical checks, then prove the repair with a controlled road test. That method is slower than guessing once, but usually faster than replacing parts repeatedly.
Frequently Asked Questions
What is the first step when a car runs roughly?
Record when the roughness occurs, whether the engine is cold or warm, and whether warning lights or unusual smells appeared. Then scan for codes before disconnecting parts or clearing evidence.
Can a weak battery cause driveability symptoms?
Yes. Low cranking voltage or poor grounds can disturb module communication and sensor readings. Test battery voltage, charging performance, and voltage drop before blaming a control module.
Does a check-engine code identify the failed part?
Usually not. A code identifies a monitored condition or circuit, so related wiring, air leaks, fuel problems, and mechanical faults may still need testing.
Why does hesitation happen only when accelerating?
Acceleration increases air, fuel, ignition, and transmission demands. A weak component may work at idle but fail under load, making load-based testing and live data particularly useful.
How can I tell an engine misfire from a transmission shudder?
An engine misfire is generally tied to combustion and engine speed, while a transmission shudder may occur during engagement or shifting. Scan data and a carefully observed road test can help separate them.
Is limp mode safe to drive in?
Limp mode should be treated as a reason to reduce load and arrange diagnosis, not as a normal operating mode. Stop and seek recovery if the vehicle has severe power loss, overheating, a stop warning, or unsafe behavior.
Should diagnostic codes be cleared after a repair?
Yes, but only after the original codes and freeze-frame data are recorded. Clear them with the proper tool, complete the required drive cycle, and confirm that the original symptom and codes do not return.